Laser Defense : 01-basics
- based on my project
This is the first part of the guide and I will cover here the basics of how to setup our project in a scalable and performant way.
In addition we will learn the basics of the sphere and how to place objects on it, lastly we will place interceptors at random positions
Setting up the project
Tech stack : React (R3F + Drei) , Zustand , TailwindCSS - we will also use TypeScript for type safety.
The FOLDERS structure will follow this example. (inside each folder there will be either nested folders or files)
/
├── public
├── src
│   ├── debug
│   ├── environment
│   ├── objects
│   │   ├── earth
│   │   ├── interceptor
│   │   └── missile
│   ├── shaders
│   ├── store
│   ├── types
│   ├── utils
│   └── Experience.tsx
├── index.html
├── package.json
└── ...
Now more specifically on the structure of the workflow - Experience.tsx will render everything as follow :
-
Debug.tsxa custom component that usesLevapackage to customize some values. Perfcomponent for performance tracker,OrbitControls,Strasbuilt in drei componentPostProcessing.tsxa custom component that will handle post processing of the scene.
Now for the “experience” itself - we will wrap those in <Suspense> with a fallback of demo wire-framed sphere.
- as their names indicates you probably know what those components responsibility is.
<Suspense fallback={<EarthPlaceholder radius={radius} />}>
    <Atmosphere />
    <Earth />
    <MissileManager />
    <InterceptorsManager />
</Suspense>
State Manager
I don’t like nesting props like crazy, so we will use Zustand as a state manager and subscribe to states as needed.
Our stores would be : gameManagerStore which handles things like sphere radius, simulation speed, and other general data. missilesStore and interceptorStore both are similar with data of the representing names and setters.
Placing Objects around a sphere
now that you get the general idea of the set up, let’s talk about how to place an object around a sphere.
we have the mathematical way with Cartesian and Geographical coordinates, but we can take the easy approach, especially with R3F nad Drei handling the heavy lifting.
Having a <mesh> with a sphere geometry in R3F can be used with onClick event like regular JSX elements so we can use that.
But we don’t want click events yet. (we will leave that for the GUI part)
For now we will generate random position according to given radius so here is a basic function to do that for example with random interceptors :
const getRandomInterceptors = (count: number, radius: number) => {
    const interceptors: Interceptor[] = Array.from({ length: count }, () => {
        const res = randomPointOnSphere(radius)
        return { position: new THREE.Vector3(res[0], res[1], res[2]), detectRadius: 0.25 }
    })
    return interceptors
}
but we need to implement randomPointOnSphere , we’ll do it the traditional way :
- Basically - we create a random point on the unit circle and push it outwards to match the radius.
- Three.JS is Y up coordinate as default and not Z-up so we switch between Y ↔ Z
export function randomPointOnSphere(radius: number): [number, number, number] {
    // random angles
    const u = Math.random();
    const v = Math.random();

    const theta = 2 * Math.PI * u;
    const phi = Math.acos(2 * v - 1);

    const x = radius * Math.sin(phi) * Math.cos(theta);
    const y = radius * Math.sin(phi) * Math.sin(theta);
    const z = radius * Math.cos(phi);

    return [x, y, z];
}
Now we can have multiple random points on a sphere, lets use them, but first we need small corrections - if we just place our mesh in this position we will have two issues :
- it won’t face outwards so we need to fix it’s rotation.
- if the mesh is pivot centered - we need to push it by half it’s height so it’s bottom will be placed on the surface and not it’s center.
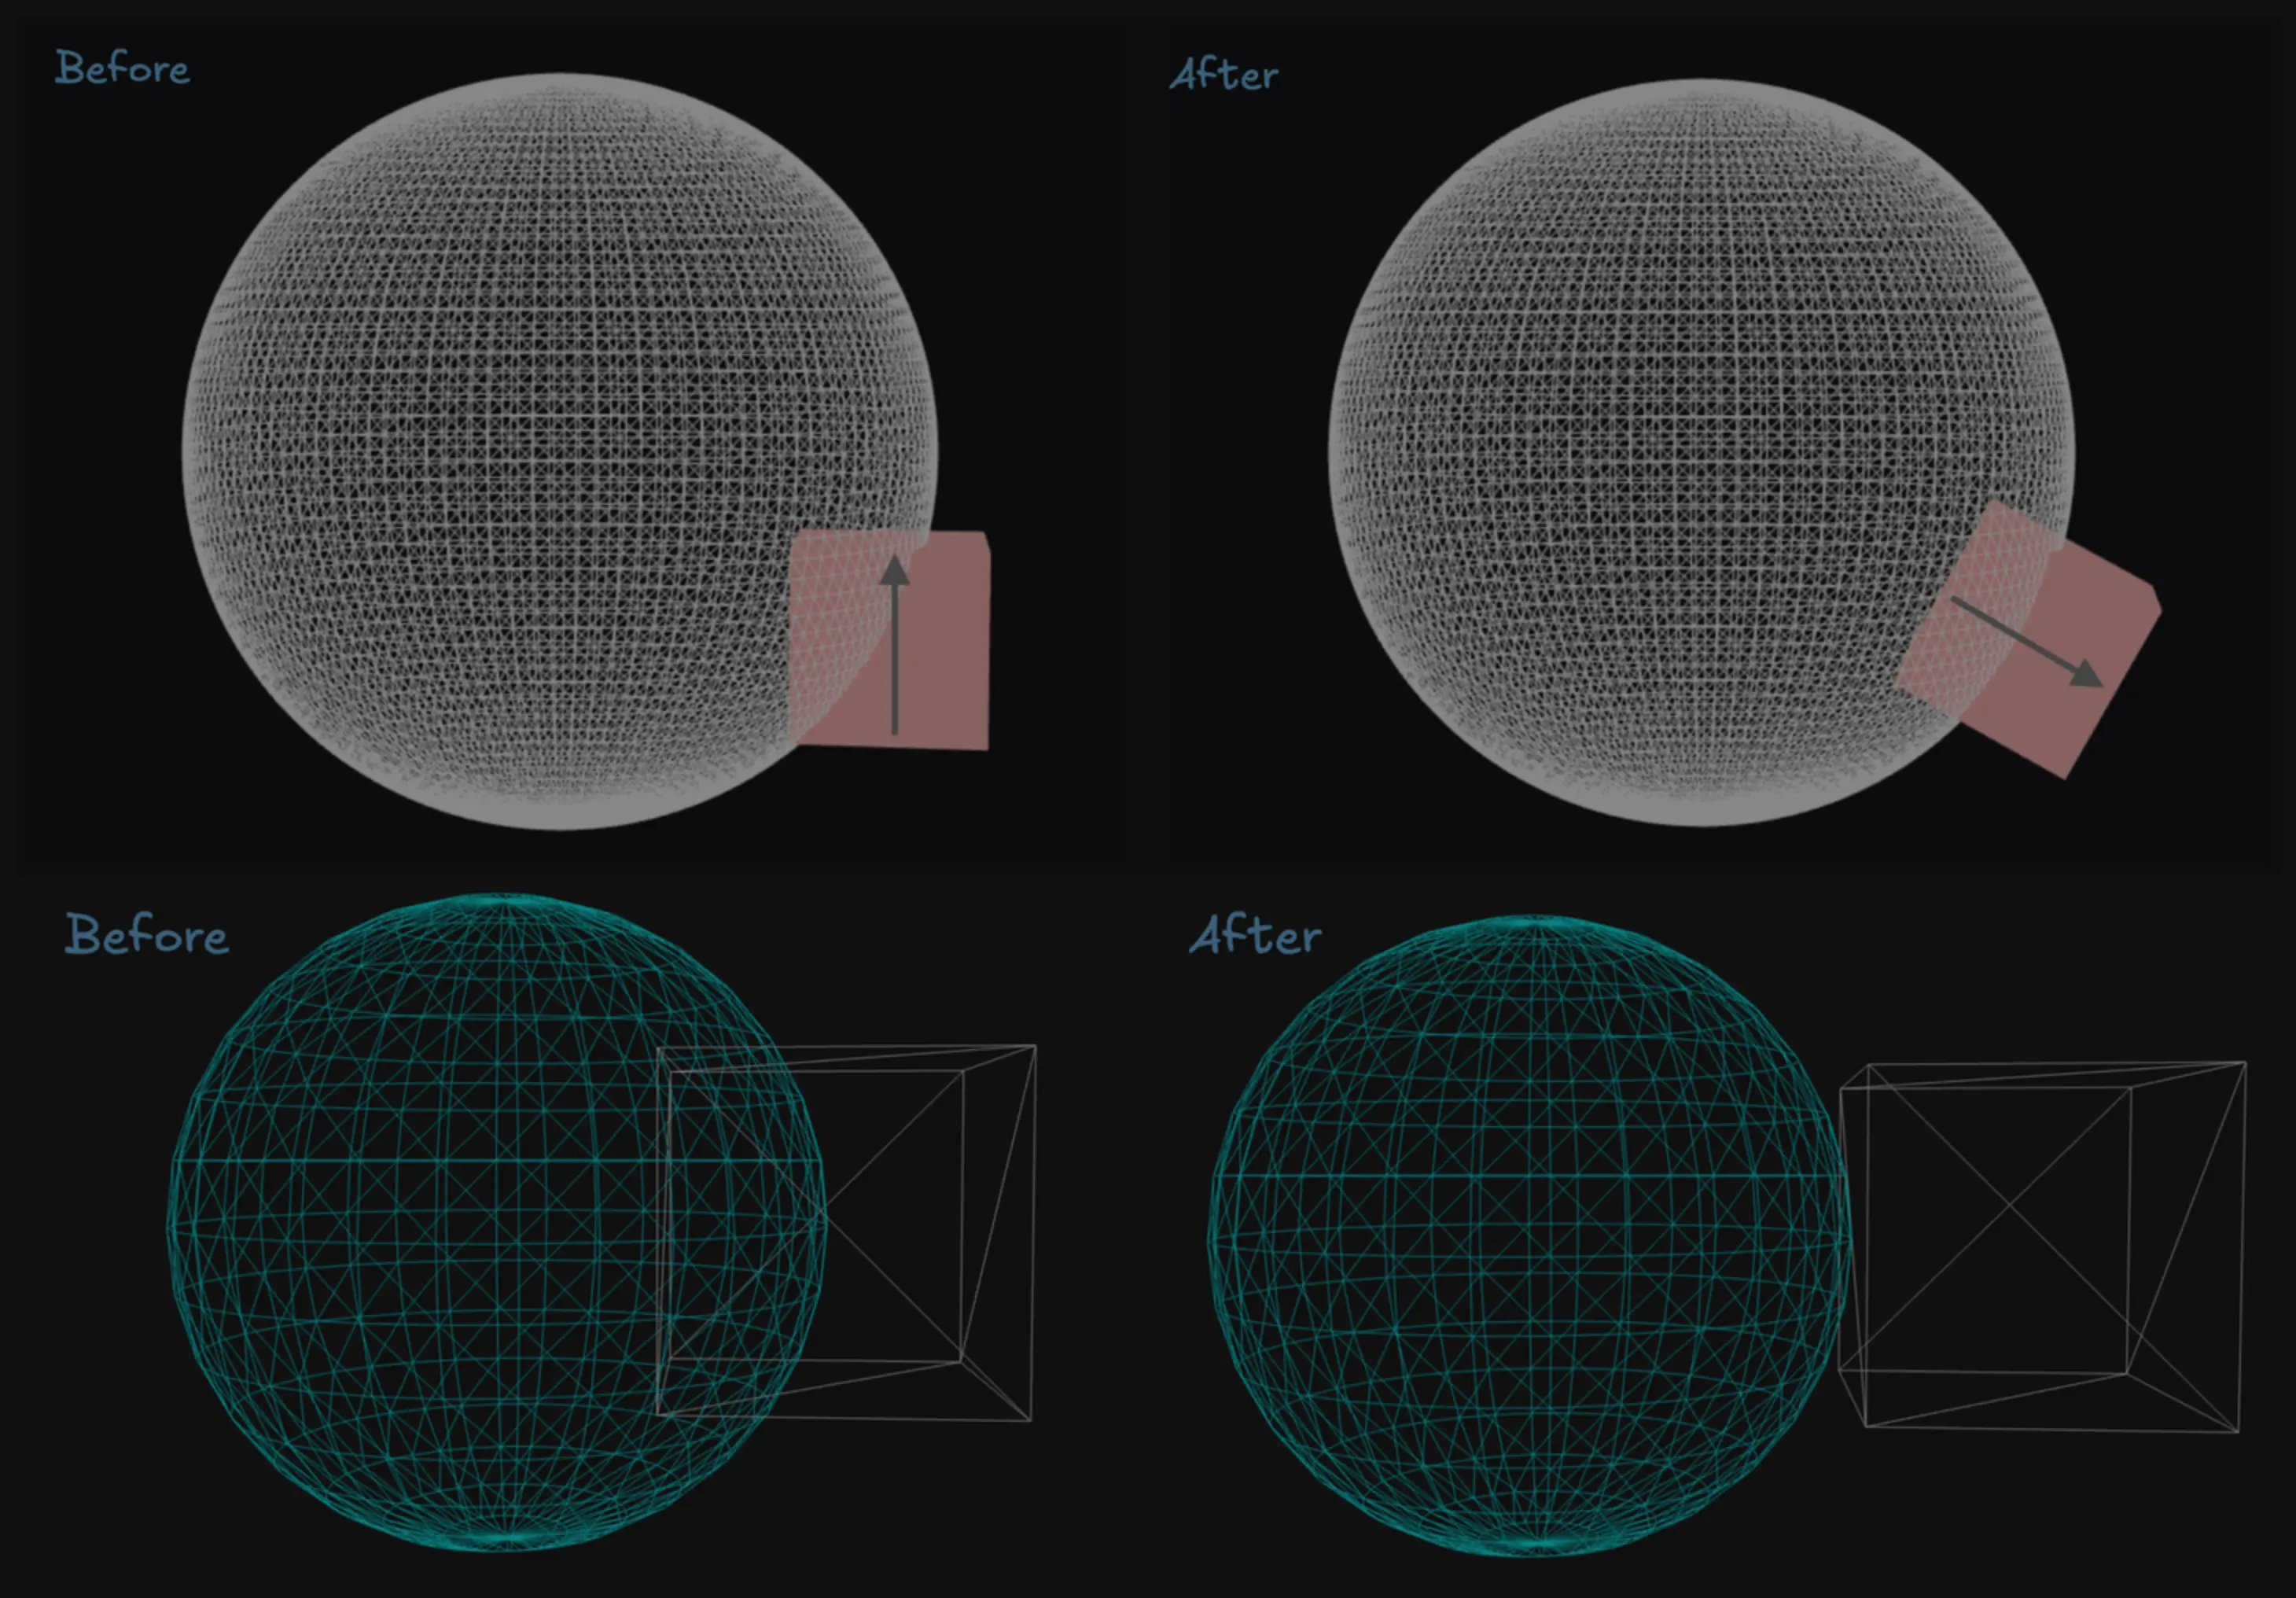
Let’s fix those two issues :
To fix the orientation , we will need to normalize it’s position values and set it to “face up” using a quaternion, combine it with adding half the height to the position.
// somewhere - need to be created once just for calculations
const up = new THREE.Vector3(0, 1, 0)
const tempQuat = new THREE.Quaternion()
const normal = new THREE.Vector3()
//...
pos.set(x,y,z)
normal.copy(pos).normalize()
tempQuat.setFromUnitVectors(up, normal)
// assuming the height value is 1
pos.addScaledVector(normal, scale * 0.5)
Now that we have a way of placing an object on the sphere surface - let’s make multiple ones ! we will use InstancedMesh for performance reasons.
Use InstancedMesh when you want to have multiple meshes with the same geometry and material - it will use 1 draw call in total instead of 1 draw call per mesh.
We will end up with the code like here